RetroPie 3.5 inch SPI display HIGH FPS (FBCP - iLi9341)
So I have this 3.5 inch display which is a copy of the WaveShare 3.5 inch display that can connect to the Raspberry Pi thru the GPIO ports. I wanted to try out some gaming using RetroPie and this display. But as soon as I managed to get the display to work I noticed that games run very bad, FPS was bad, refresh rate were bad, so I started to mess around with the settings to get better performance, but I just could not get the result that I wanted until I came across project FBCD iLi9341. So ill share the full story of how this went, I will share some marks so you can jump to the paragraph that interests you if you don’t want to read thru the whole story.
- What is RetroPie ?
- WaveShare Drivers paragraph
- Project FBCP iLi9341
- Installing RetroPie ?
- Setting up RetroPie
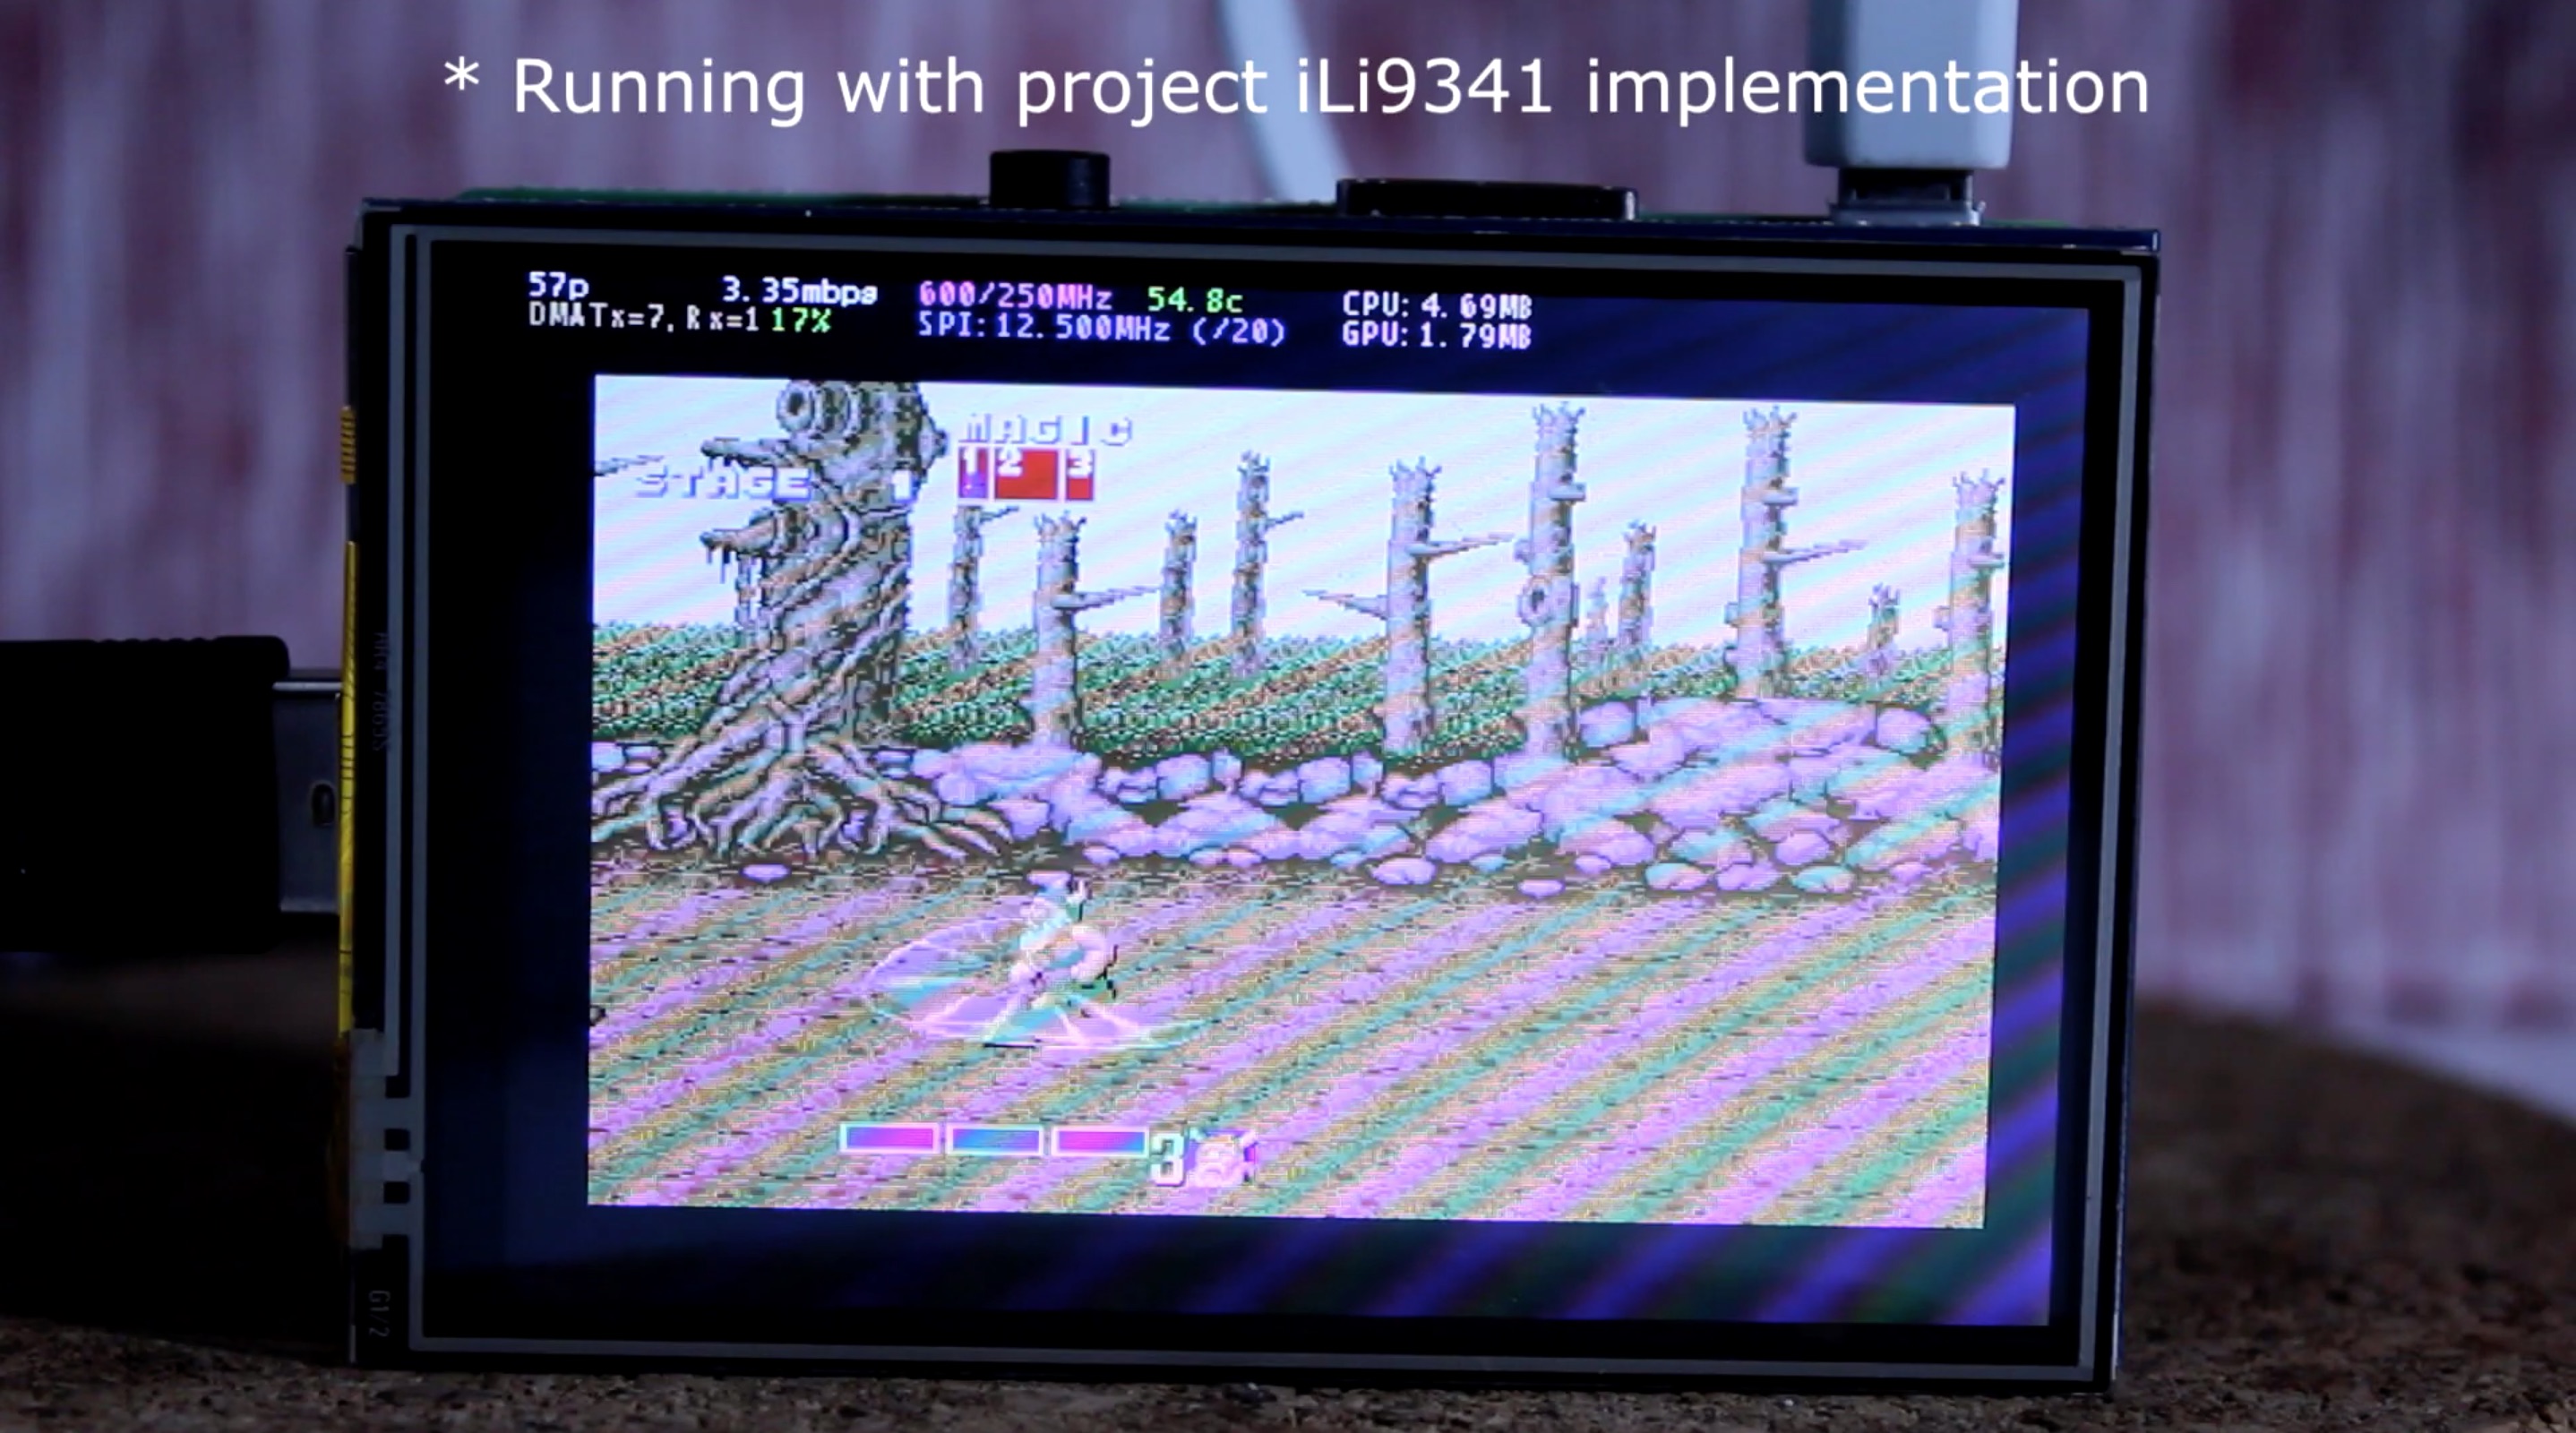
- Project FBCP iLi9341 implementation
- Conclusion
What is RetroPie ?
 In short RetroPie is the most popular emulator for Raspberry Pi. It is built on top of Raspbian, Emulation Station, Retro Arc and many other projects and this allows you to turn your Raspberry Pi in to a retro gaming machine where you can transfer your ROM's and play those retro games. Finding ROM's is not an easy task so I suggest googling a bit about it.
WaveShare Drivers
At first I installed the WaveShare drivers even though my display is not manufactured by WaveShare, these drivers did work. But as I stated before games were unplayable so I started to mess around with the settings. I opened up the config file with Nano
1 | sudo nano /boot/config.txt |
And inside I edited this line (this line wont be there unless you add it after you install the drivers)
1 | dtoverlay=waveshare35a,fps=50,speed=48000000,debug=32,bgr=1 |
I really tried a lot of different settings that I read of forums and tried my own trial and error values. At the end I did manage to get it to run a lot better than when I first started.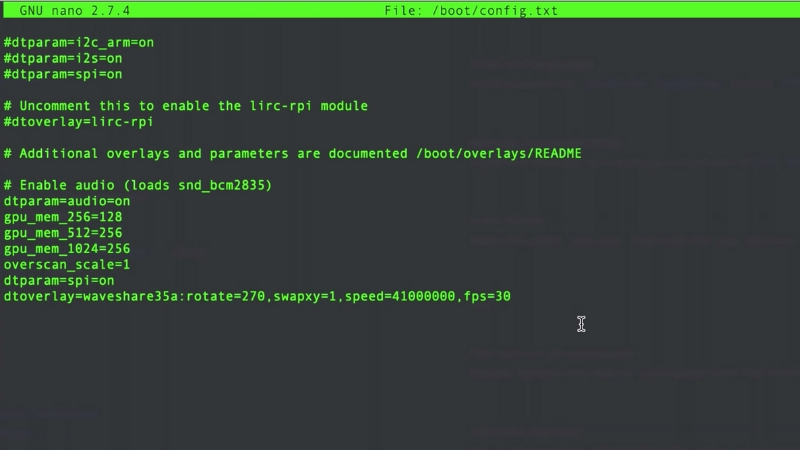
Project FBCP iLi9341
 This is a blazing fast Raspberry Pi driver. The drivers main goal is to produce high framerates over an SPI (*Serial Peripheral Interface*) BUS. In short the way this works is by something they call adaptive display stream updates. Basically this boils down to the fact that in stead of uploading each pixel at each display refresh cycle, only the actual changed pixel on the screen are submitted to the display. This is doable because the iLi9341 controller (*LCD controller*) as many other popular controllers have communication interface functions that allow specifying partial screen updates. So for example if we have a game with a bunch of UI elements, most of the time there is no need to update the pixels where the UI elements are, or sometimes we have backgrounds that don't change, same here no need to update those pixels on the screen. Therefore we lower percentage of screen pixels that need to change every rendered frame and we save on some processing power. Now that we have a basic understanding of this controller and drivers let's see how it will perform when we implement it with our Raspberry Pi.
Installing RetroPie ?
 Since there are plenty of how-to's online for this, ill try and make it as short and as straight to the point as possible.
- First we download the OS from [RetroPie site](https://retropie.org.uk/download/)
- Format SD card, I'm on a mac so I used [SD Card Formatter](https://www.sdcard.org/downloads)
- Next we insert the SD card and unmount it so that we can install the OS. With the help of
Since there are plenty of how-to's online for this, ill try and make it as short and as straight to the point as possible.
- First we download the OS from [RetroPie site](https://retropie.org.uk/download/)
- Format SD card, I'm on a mac so I used [SD Card Formatter](https://www.sdcard.org/downloads)
- Next we insert the SD card and unmount it so that we can install the OS. With the help of diskutil list we list our drives and find the SD card drive path. We will need the path later ( see picture below).
- From here since my SD card drive is /dev/disk2 I run
1 | unmountDisk /dev/disk2 |
After successful unmount I ran this command
1 | sudo dd bs=1m if=Downloads/retroPiImage.img of=/dev/rdisk2 conv=sync |
if=Downloads/retroPiImage.img Here I’m passing in the path of the RetroPie image file. If you are on a MAC you can just drag and drop the file here and it will output the path (I don’t know if this works on Windows), and than here of=/dev/rdisk2 you add your diskutil disk number.
After this the installation process will start. If you want to get more information you can press CMD+T to get the status of the process.
Setting up RetroPie
After the first boot-up you will be asked to configure your controller, the interface will ask you to press some of the buttons on your controller to set it up.
RASPI-CONFIG than go to *interfacing options -> SSH* select and enable the SSH. Here we also need to enable the wi-fi so navigate to the WIFI menu and connect to your wi-fi network, if you are doing this first time it might ask you to input your country. Than just type your password and you are set. After this step I suggest rebooting the PI with
1 | sudo reboot |
After the restart we’ll need the IP address of the pi, navigate to the SHOW IP menu and it will prompt you with the PI’s IP address, write this IP down since we will need it later.
Project FBCP iLi9341 implementation
 Alright now that we have done the setup it's time to access the PI.
Go ahead and open up your terminal, or if you are on Windows you can take a look at [putty](https://www.putty.org/).
Alright now that we have done the setup it's time to access the PI.
Go ahead and open up your terminal, or if you are on Windows you can take a look at [putty](https://www.putty.org/).
Next we can connect thru SSH
1 | sudo ssh [email protected] |
Here you input the IP address of your PI, mine was 192.168.1.139 at the time. Next you’ll be asked to input a password default password is raspberry. Alright now that we have access to the PI it’s time to start installing.
First make sure you have Cmake installed.
1 | sudo apt-get install cmake |
Next clone the repository
1 | git clone https://github.com/juj/fbcp-ili9341.git |
Next CD in to the downloaded folder
1 | cd fbcp-ili9341 |
And here we will make a new directory, you can call this anything you like but basically this will be the directory where we will store our Build for the driver.
1 | mkdir build |
Navigate inside
1 | cd build |
Next we will run the Cmake command
1 | cmake -DSPI_BUS_CLOCK_DIVISOR=20 -DADAFRUIT_ILI9341_PITFT=ON .. |
-DSPI_BUS_CLOCK_DIVISOR=20 This option takes and even number and sets the clock divisor value, alongside with the PI core frequency (that you can find in boot/config.txt) specifies the speed that the SPI communication bus is driven at. You might need to experiment with this value if your display has corrupted output or doesn’t work at all. You can try a larger value if your display shows corrupted output or smaller value to get higher bandwidth. For me I found that 20 works best. than -DWAVESHARE35B_ILI9486=ON this flag basically targets the WaveShare 3.5 inch display. If you have a different display I suggest reading thru the repository for the other options you can have. The repository is very well written so you should have no troubles finding your way around the documentation.
Next the two dots .. mean that we will have the build inside the build folder but the tools are one folder up above.
Next run
1 | make -j |
And then we check if the display works.
Go ahead and run
1 | sudo ./fbcp-ili9341 |
After this command the display should work fine. But if for some reason it doesn’t work first make sure there is no other FBCP driver running on your pi, if there is you can kill it with
1 | sudo pkill fbcp |
If that doesn’t work than you can remove the Build directory and start this process once again with a different DSPI_BUS_CLOCK_DIVISOR value or some other flags depending on your display. Again check the repository for that.
So once you get your display working you’ll want to run the driver at startup, instead of running it manually we are going to add it to the start script. So run Nano
1 | sudo nano /etc/rc.local |
and before the exit 0 add this line
1 | sudo /home/pi/fbcp-ili9341/build/fbcp-ili9341 & |
If you’re build is in a different place than change this /home/pi/fbcp-ili9341/build/fbcp-ili9341 path with the one you have. CMD+O will save the changes in Nano, CMD+X will exit.
And that’s it your are pretty much set. Now you can just reboot and enjoy.
Conclusion
All in all this was a fun little project to try. But in my opinion gaming on the PI with this type of display is doable but it’s not the best. I would really opt for an HDMI display. In the video below at the end of it I do a little comparison between the HDMI and the WaveShare knockoff display running with the project FBCP-iLi9341 drivers. And for me gaming on a 3.5 inch display is not satisfying, I know of the fact that is very portable. But really I would opt for a bigger HDMI display like a 7 inch at least. Thanks and I’ll see you in the next one.